If you are like me and want the comfort and support that Microsoft’s Visual Studio 10 provides, then you will defiantly want that support in your MASM programming tasks. Visual studio makes this quite easy, with a couple of project property changes you will be on your way to MASM programming bliss.
Steps
- Create new Visual C++ Empty Project

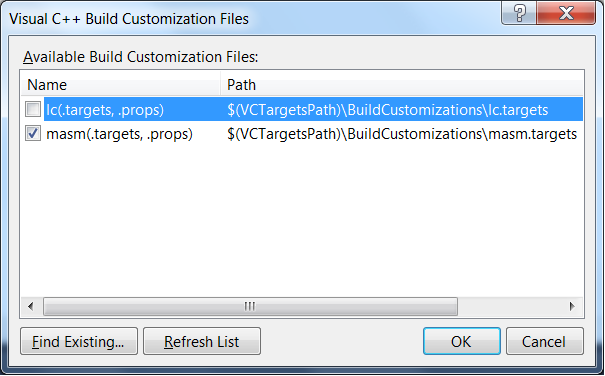
- Right click on the newly created project and select Build Customizations; select masm option, press ok then save the project.

- Go to project properties and select linker->system then change subsystem to Windows (/SUBSYSTEM:CONSOLE)

- Download and install masm32 libraries then add them to your linker settings.

- Go to linker->Advanced and change Entry Point to main [this is what the linker will look for when mapping the entry point for your app.]

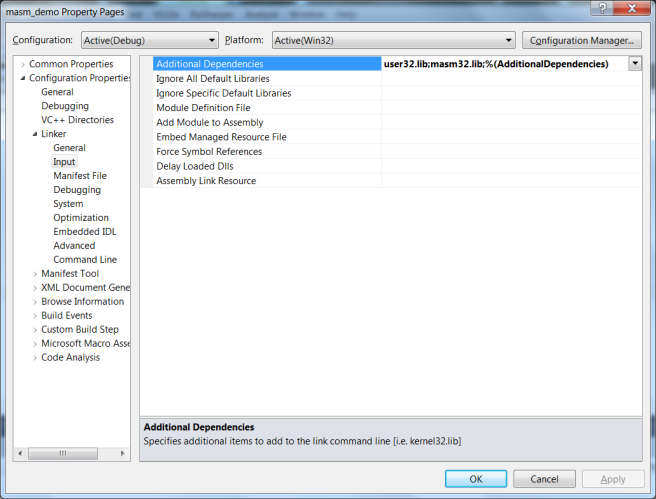
- Go to Linker->Input and add masm32.lib to Additional Dependencies.

- Go to Microsoft Macro Assembler->General and add the masm32 libraries.

- Download and paste usertype.dat into C:\Program Files (x86)\Microsoft Visual Studio 10.0\Common7\IDE
- Go to Visual Studio Options->Text Editor->File Extensions: Type asm in the extension box then select Microsoft Visual C++ from the list.
- Right click on project and select Add->New Item: Select Text File and save with *.asm

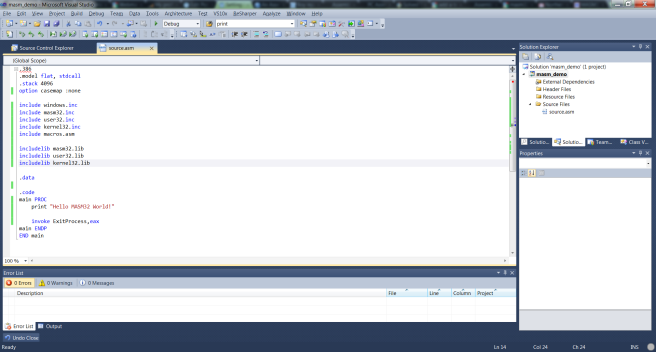
- Create, run and enjoy your code 🙂

In a future post I will show how to turn this project into a Visual Studio project template.